In this blog we will setup firebase web push notification in wordpress website but before going to configure you first create project in firebase and if you don’t know then please refer my first blog
Once you get apiKey and projectId you can follow below steps:
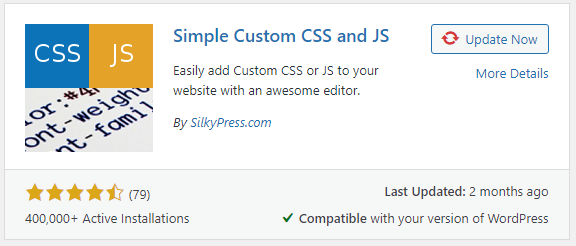
Step 1: Install Simple Custom CSS and JS wordpress plugin
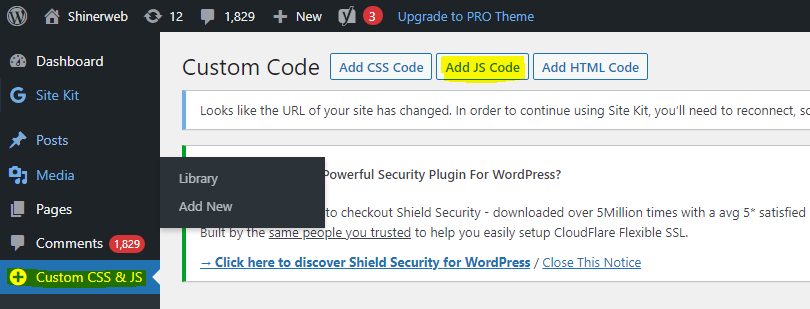
Step 2 : Once install that plugin and go to that plugin and click on ADD JS Code
Step 3: Add below JS code and ajax call to save token
<script src="https://www.gstatic.com/firebasejs/7.14.6/firebase-app.js"></script>
<script src="https://www.gstatic.com/firebasejs/7.14.6/firebase-messaging.js"></script>
<script>

    var firebaseConfig = {
      apiKey: "YOUR_API_CODE",
      authDomain: "shinerweb-notification.firebaseapp.com",
      projectId: "shinerweb-notification",
      storageBucket: "shinerweb-notification.appspot.com",
      messagingSenderId: "459282708050",
      appId: "1:459282708050:web:f5daaef63cdbc3db1fd18b",
      measurementId: "G-DN4GKKT3E9"
    };
    firebase.initializeApp(firebaseConfig);
    const messaging=firebase.messaging();

    function IntitalizeFireBaseMessaging() {
        messaging
            .requestPermission()
            .then(function () {
                console.log("Notification Permission");
                return messaging.getToken();
            })
            .then(function (token) {
                console.log("Token : "+token);
          	//start code to save token into database
           	 jQuery.ajax({
               url:"https://www.shinerweb.com/index.php/notification_sw/save_token",
               type:"POST",
               dataType: 'json',
               data: {token:token},
               success:function(response){
                 if(response.status == true)
                 {
                   console.log(response.msg);
                 }
                 else
                 {
                   console.log(response.msg);
                 }
                },
                error: function (xhr, status) {
                $(".loader-div").hide(); // hide loader
                console.log('ajax error = ' + xhr.statusText);
                }
             });
             //end code to save token into database
                //document.getElementById("token").innerHTML=token;
            })
            .catch(function (reason) {
                console.log(reason);
            });
    }

    messaging.onMessage(function (payload) {
        console.log(payload);
        const notificationOption={
            body:payload.notification.body,
            icon:payload.notification.icon
        };

        if(Notification.permission==="granted"){
            var notification=new Notification(payload.notification.title,notificationOption);

            notification.onclick=function (ev) {
                ev.preventDefault();
                window.open(payload.notification.click_action,'_blank');
                notification.close();
            }
        }

    });
    messaging.onTokenRefresh(function () {
        messaging.getToken()
            .then(function (newtoken) {
                console.log("New Token : "+ newtoken);
            })
            .catch(function (reason) {
                console.log(reason);
				//alert(reason);
            })
    })
    IntitalizeFireBaseMessaging();
</script>
Step 5: To store tokens details you need to create one table
CREATE TABLE `notification_tokens_tbl` (
  `id` int(10) unsigned NOT NULL AUTO_INCREMENT,
  `token` varchar(455) COLLATE utf8mb4_unicode_ci NOT NULL,
  `delete_status` char(1) COLLATE utf8mb4_unicode_ci NOT NULL DEFAULT 'N',
  `created_at` timestamp NULL DEFAULT NULL,
  `created_by` int(11) DEFAULT NULL,
  `updated_at` timestamp NULL DEFAULT NULL,
  `updated_by` int(11) DEFAULT NULL,
  PRIMARY KEY (`id`)
) ENGINE=InnoDB DEFAULT CHARSET=utf8mb4 COLLATE=utf8mb4_unicode_ci;
Step 4: Here we are using CodeIgniter framework to save the token but if you are using some another framework or core php for the same and code as below
//write below function in your controllers folder
function save_token()
    {
        $this->send_notification_model->save_token();
    }
//write below function in your models folder
function save_token()
{
$token = $this->input->post('token');
if(isset($token) && !empty($token))
{
//Insert mode
$data = array(
'token' => $token,
'delete_status'=>'N',
'created_at' => date('y-m-d H:i:s'),
);
$this->db->insert('notification_tokens_tbl', $data);
$insert_id= $this->db->insert_id();
if ($insert_id != '') {
$data = array(
'status' => true,
'msg' => 'Record # '.$insert_id.' saved successfully. Thank you!'
);
} else {
$data = array(
'status' => false,
'msg' => 'Record not save.'
);
}
} else {
$data = array(
'status' => false,
'msg' => 'Token not set.'
);
}
echo json_encode($data);
}
Now whenever any one visit your website will register or save his token in to our database.
Step 5: Now whenever you sent push notification to every users then you must have to write below code.
create one simple html page to sent notification

Form code as below:
<form method="post" action="https://app.shinerweb.com/index.php/notification_sw/send">
Title<input type="text" name="title">
Message<input type="text" name="body">
Icon path<input type="text" name="icon">
Blog link<input type="text" name="click_action">
<input type="submit" value="Send notification">
</form>
Here also we are using CodeIgniter framework to sent notification you can also use another language or core php for the same
//write below function in your controllers folder
function send()
    {
        $this->send_notification_model->send();
    }
//write below function in your models folder
function send()
{
$query = $this->db->query("SELECT distinct token FROM `notification_tokens_tbl` where delete_status='N'");
$query_res = $query->result();
foreach ($query_res as $query_res_data) {
$registrationIds[] =$query_res_data->token;
}
$url ="https://fcm.googleapis.com/fcm/send";
//"to" for single user
//"registration_ids" for multiple users
$title = $this->input->post('title');
$body = $this->input->post('body');
$icon = $this->input->post('icon');
$click_action = $this->input->post('click_action');
if(isset($title) && !empty($title))
{
$fields=array(
"registration_ids"=>$registrationIds,
"notification"=>array(
"body"=>$body,
"title"=>$title,
"icon"=>$icon,
"click_action"=>$click_action
)
);
//print_r($fields);
//exit;
$headers=array(
'Authorization: key=YOUR_KEY',
'Content-Type:application/json'
);
$ch=curl_init();
curl_setopt($ch,CURLOPT_URL,$url);
curl_setopt($ch,CURLOPT_POST,true);
curl_setopt($ch,CURLOPT_HTTPHEADER,$headers);
curl_setopt($ch,CURLOPT_RETURNTRANSFER,true);
curl_setopt($ch,CURLOPT_POSTFIELDS,json_encode($fields));
$result=curl_exec($ch);
print_r($result);
curl_close($ch);
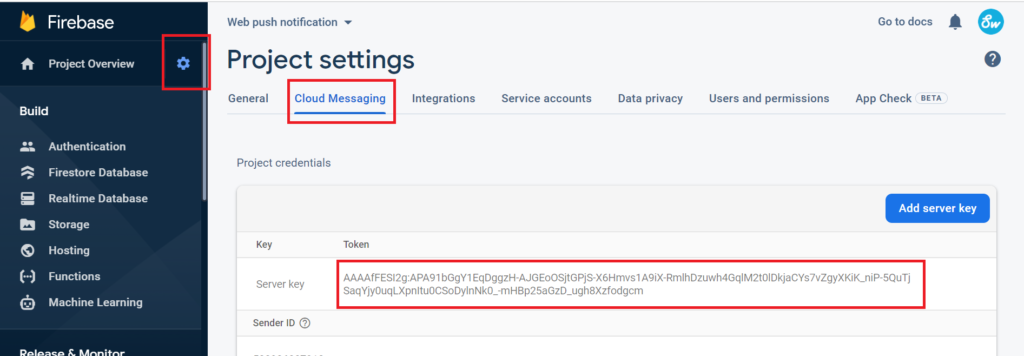
} You can get Authorization: key from below screenshot
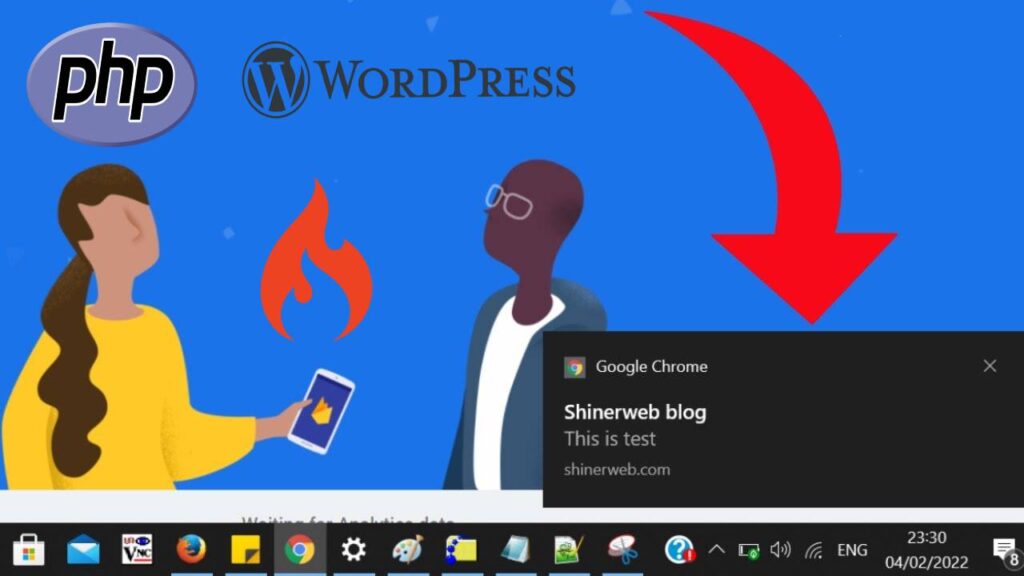
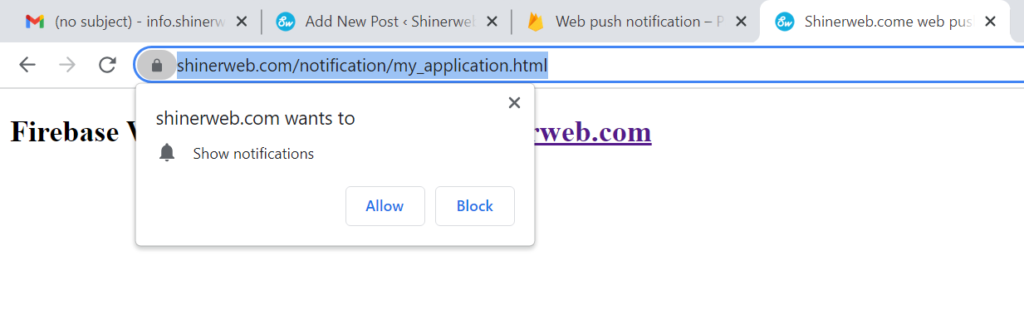
Now your web push notification is ready you can check our website www.shinerweb.com we have already configured.
You need full code then click here
If you have any query then write comment on our blog or youtube channel @shinerweb.