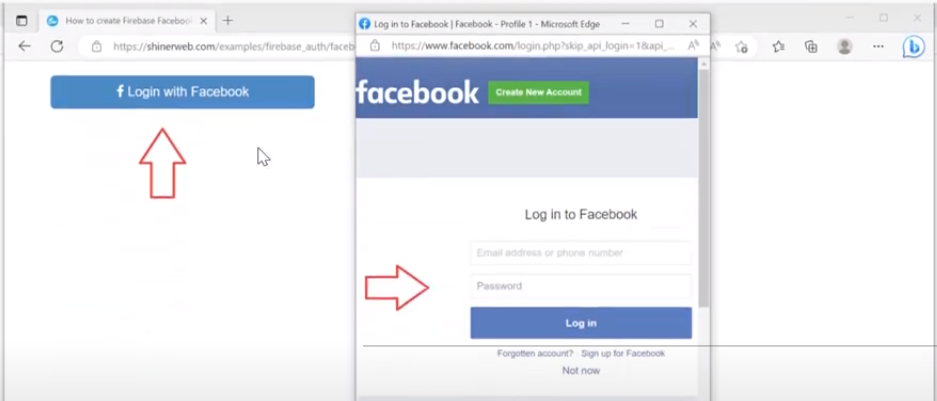
In this blog we will authenticate users with Firebase using their Facebook accounts by integrating Facebook Login into your app. Here we authenticate using facebook login with FacebookAuthProvider method of JavaScript.
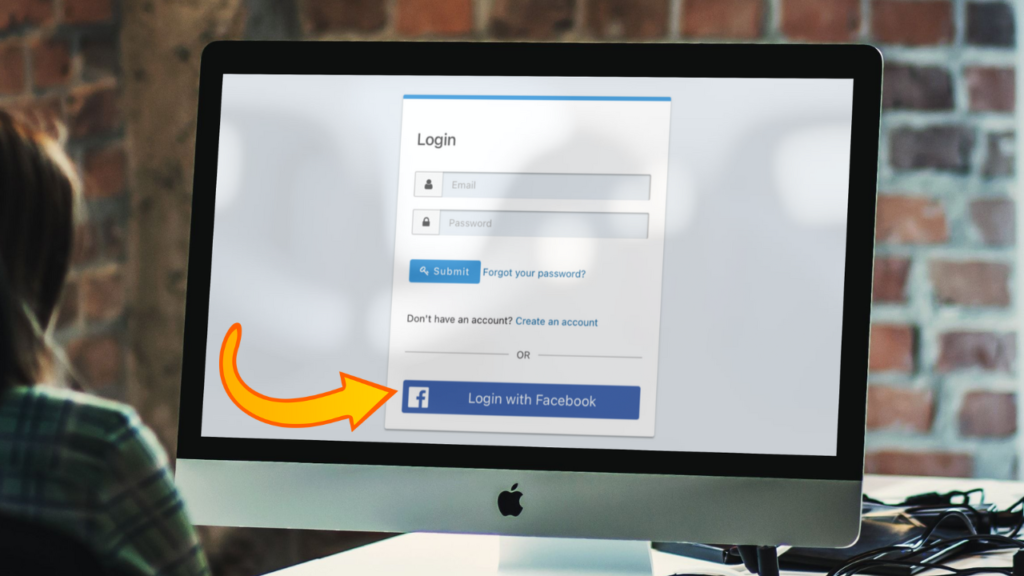
To handle the Facebook sign-in flow with the Firebase JavaScript, follow these steps:
Step 1: Go to Firebase console and create new project.

Step 2: Define your project name

Step 3: Click on continue to create project
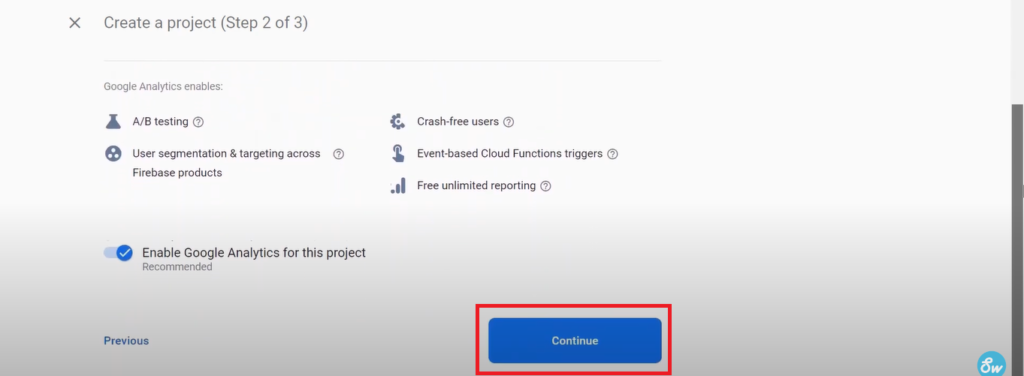
Step 4: Select the Google Analytics Account

Step 5: Create new Firebase App.
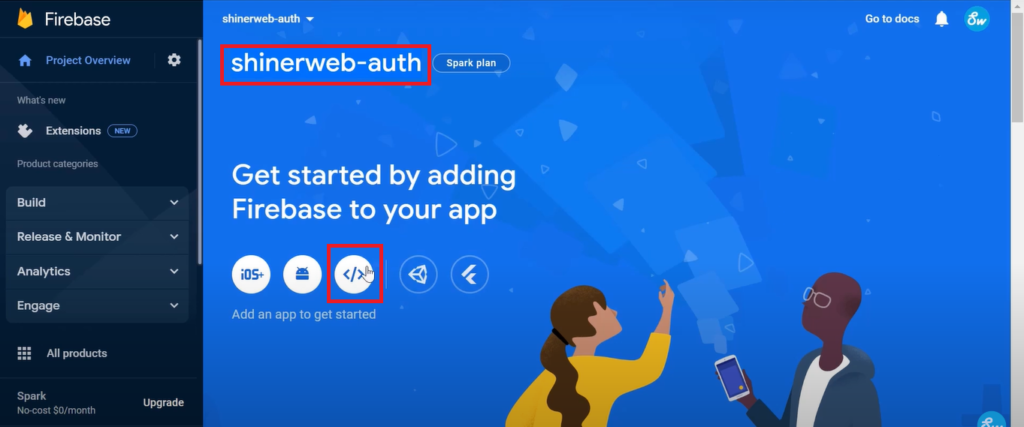
Step 6: Register your web app.
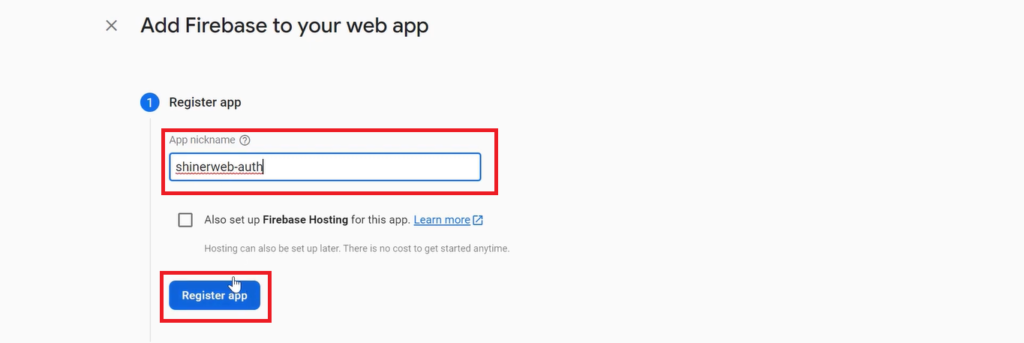
Step 7: Copy below code which will be helpful for further coding.
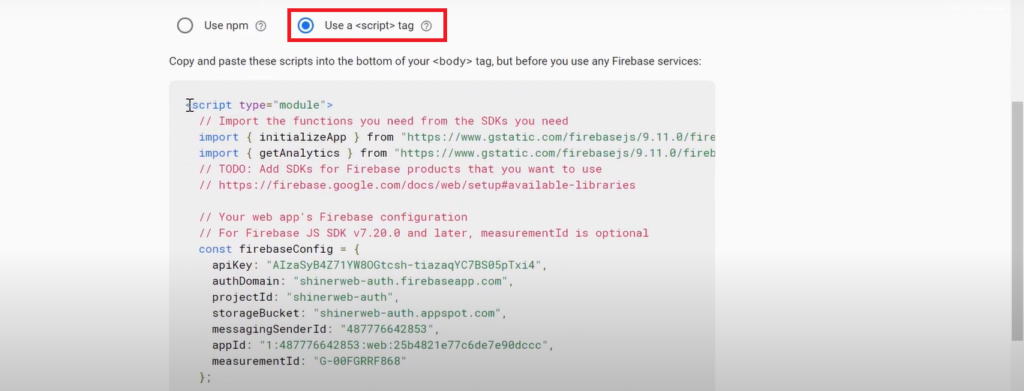
Step 8: Create one file facebook-login.html and you can write below code.
<!DOCTYPE html>
<html>
<head>
	<meta name="viewport" content="width=device-width, initial-scale=1.0">
	<script src="https://cdnjs.cloudflare.com/ajax/libs/jquery/3.6.0/jquery.min.js" ></script>
	<!-- Bootstrap theme -->
	<link rel="stylesheet" href="https://maxcdn.bootstrapcdn.com/bootstrap/3.4.1/css/bootstrap.min.css">
	<script src="https://maxcdn.bootstrapcdn.com/bootstrap/3.4.1/js/bootstrap.min.js"></script>
	<!-- Add icon library -->
	<link rel="stylesheet" href="https://cdnjs.cloudflare.com/ajax/libs/font-awesome/4.7.0/css/font-awesome.min.css">
	<title>How to create Firebase Facebook Login?</title>
</head>
<body>
<br>
<div class="container">
  <div class="row">
	<div class="col-sm-4">
		<button type="button" id="facebook-login" name="facebook-login" class="btn btn-primary btn-lg btn-block"><i class="fa fa-facebook "></i> Login with Facebook</button>
	</div><!-- end col -->
  </div><!--  end row -->
  </form>
</div>
<br>
<center>Developed by <a href="https://shinerweb.com/">Shinerweb</a></center>
</body>
	<script type="module">
	  // Import the functions you need from the SDKs you need
	  import { initializeApp } from "https://www.gstatic.com/firebasejs/9.11.0/firebase-app.js";
	  import { getAnalytics } from "https://www.gstatic.com/firebasejs/9.11.0/firebase-analytics.js";
	  import { getAuth, FacebookAuthProvider, signInWithPopup } from "https://www.gstatic.com/firebasejs/9.11.0/firebase-auth.js";
	  // TODO: Add SDKs for Firebase products that you want to use
	  // https://firebase.google.com/docs/web/setup#available-libraries

	  // Your web app's Firebase configuration
	  // For Firebase JS SDK v7.20.0 and later, measurementId is optional
	  const firebaseConfig = {
		  apiKey: "AIzaSyB4Z71YW8OGtcsh-tiazaqYC7BS05pTxi4",
		  authDomain: "shinerweb-auth.firebaseapp.com",
		  projectId: "shinerweb-auth",
		  storageBucket: "shinerweb-auth.appspot.com",
		  messagingSenderId: "487776642853",
		  appId: "1:487776642853:web:25b4821e77c6de7e90dccc",
		  measurementId: "G-00FGRRF868"
		};

	  // Initialize Firebase
	  const app = initializeApp(firebaseConfig);
	  const analytics = getAnalytics(app);
	  const auth = getAuth();
	  //console.log(auth);

	  const provider = new FacebookAuthProvider();
	  console.log(provider);

	  //----- facebook login code start
	  document.getElementById("facebook-login").addEventListener("click", function() {
		  signInWithPopup(auth, provider)
		  .then((result) => {
		    // The signed-in user info.
		    const user = result.user;

		    // This gives you a Facebook Access Token. You can use it to access the Facebook API.
		    const credential = FacebookAuthProvider.credentialFromResult(result);
		    const accessToken = credential.accessToken;

		    alert("Welcome "+user.displayName);
		    console.log(user);
		    // ...
		  })
		  .catch((error) => {
		    // Handle Errors here.
		    const errorCode = error.code;
		    const errorMessage = error.message;
		    console.log(errorMessage);
		    // The email of the user's account used.
		    const email = error.customData.email;
		    // The AuthCredential type that was used.
		    const credential = FacebookAuthProvider.credentialFromError(error);

		    // ...
		  });
	  });
	  //----- End

	</script>
</html>
In above code we have created one simple facebook login button as below:
<button type="button" id="facebook-login" name="facebook-login" class="btn btn-primary btn-lg btn-block"><i class="fa fa-facebook "></i> Login with Facebook</button>Also we have use FacebookAuthProvider and signInWithPopup method for login with Facebook.
Step 9: Now enable your Facebook Login


Select the Facebook option from above list
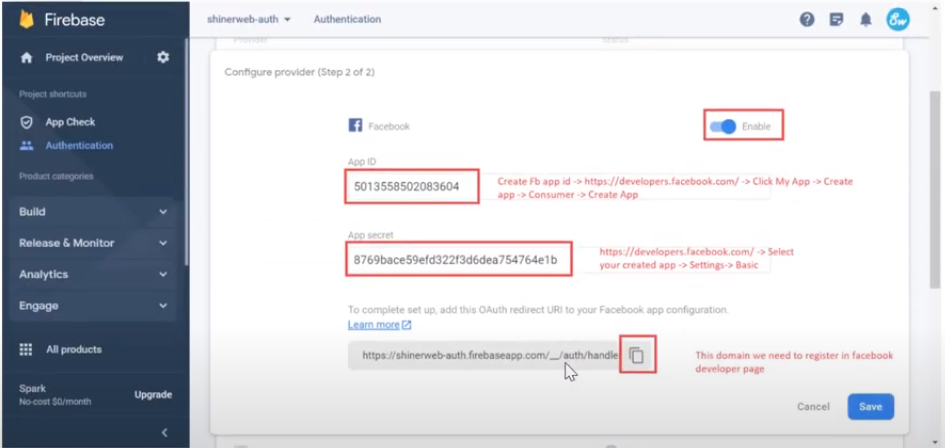
Enable the Facebook login and enter App ID and App secret key which you will get from https://developers.facebook.com/ and also we will share some steps how to get Facebook app id and App secret key. Once you will get both the key and click on Save button.
Step 11: Get Facebook App id and App Secret key
Click here https://developers.facebook.com/

Click on My Apps

Click on Create App
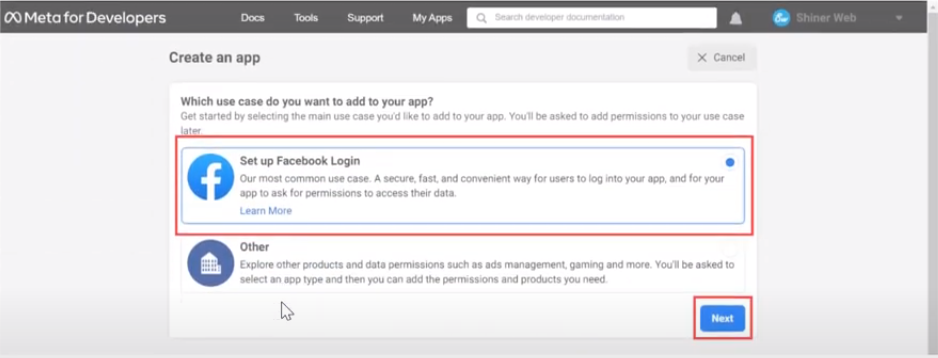
Click on Set up Facebook login and after that click on Next and fill all the rest of details and once your app created you need to select your app as below.
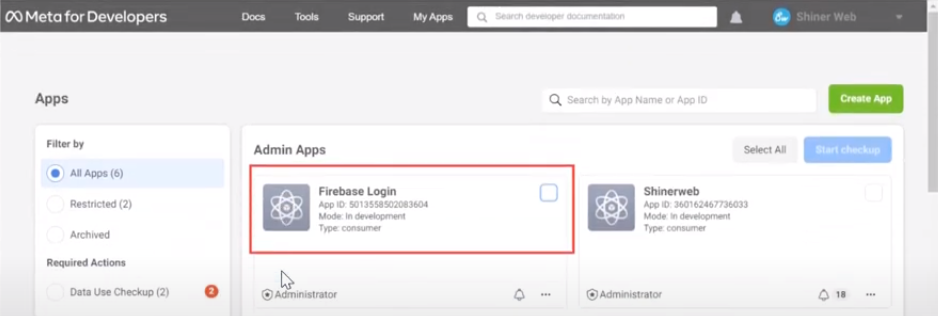
Click on your created app
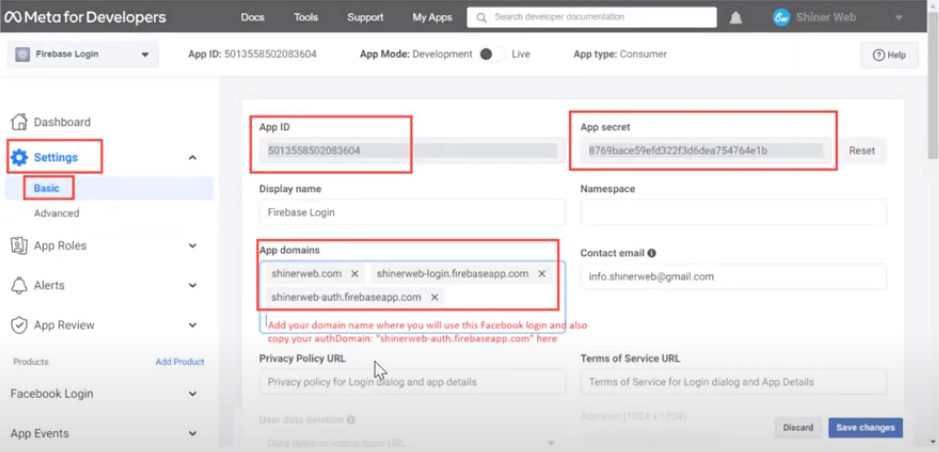
You will get your App ID and App Secret key which is used in Firebase App.
Step 12: Set Valid OAuth Redirect URIs
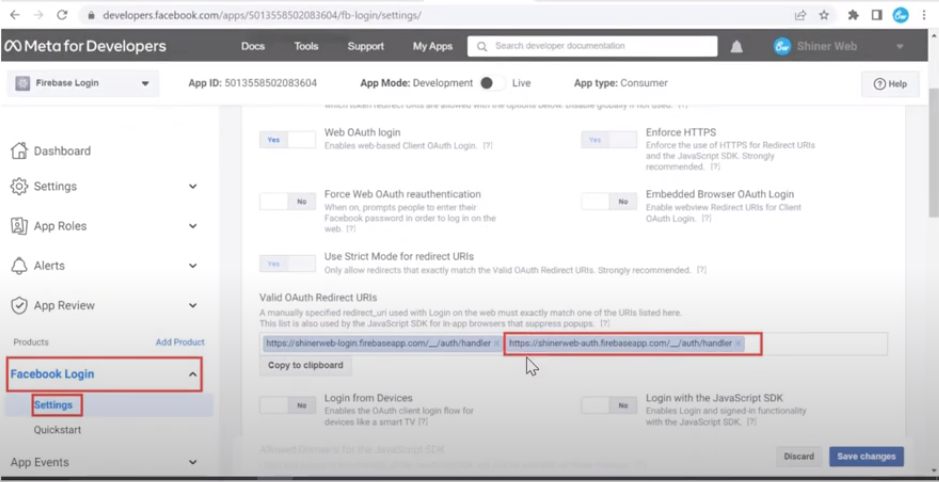
Copy paste your OAuth redirect link from Firebase App.
Step 13: Now back to firebase and add your Domain for OAuth redirects in firebase app.

If you will not add your domain then it will give below message in console log.
Info: The current domain is not authorized for OAuth operations. This will prevent signInWithPopup, signInWithRedirect, linkWithPopup and linkWithRedirect from working. Add your domain (shinerweb.com) to the OAuth redirect domains list in the Firebase console -> Authentication -> Settings -> Authorized domains tab.
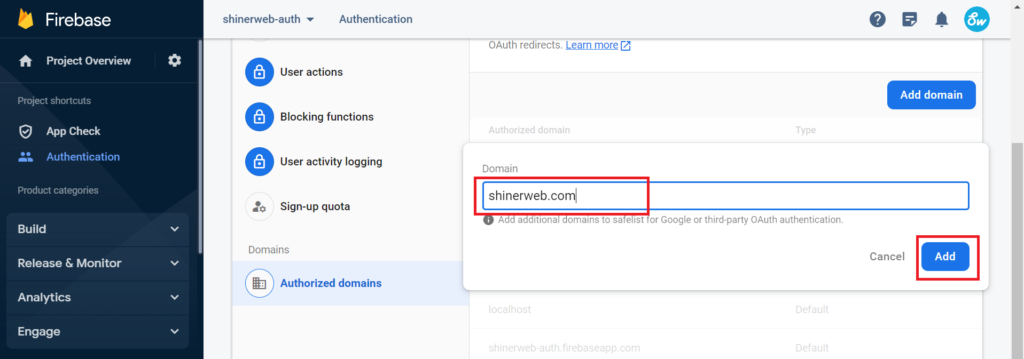
Set below some settings also for user account linking
When you will get this error “Firebase: Error (auth/account-exists-with-different-credential).” then you must have to select Create multiple accounts for each identity provider option and click on save button.
Now everything is set you can test your project in browser.

