When you call Ajax and you need to display loading image or loader then you must have to follow this blog. In this blog we will create live example to display loading image or loader when Ajax call is in progress.

Let’s start step by step to configure the code for ajax loader.
Step 1: Create one simple table like calendar_event_master and store some sample data which we will use for demo purpose.
CREATE TABLE `calendar_event_master` (
  `event_id` int(11) NOT NULL AUTO_INCREMENT,
  `event_name` varchar(255) DEFAULT NULL,
  `event_start_date` date DEFAULT NULL,
  `event_end_date` date DEFAULT NULL,
  PRIMARY KEY (`event_id`)
) ENGINE=InnoDB DEFAULT CHARSET=latin1;

insert into `calendar_event_master`(`event_id`,`event_name`,`event_start_date`,`event_end_date`) values (1,'Test Event1','2022-10-01','2022-10-02');
insert into `calendar_event_master`(`event_id`,`event_name`,`event_start_date`,`event_end_date`) values (2,'Test Event2','2022-10-13','2022-10-20');
insert into `calendar_event_master`(`event_id`,`event_name`,`event_start_date`,`event_end_date`) values (3,'Test Event3','2022-10-16','2022-10-27');
Step 2: Now you need to create one simple HTML file add below code.
<!DOCTYPE html>
<html>
<head>
	<meta name="viewport" content="width=device-width, initial-scale=1.0">
	<title>How to display loading image or loader when Ajax call is in progress?</title>
	<script src="https://cdnjs.cloudflare.com/ajax/libs/jquery/3.6.0/jquery.min.js" ></script>
	<script src="https://maxcdn.bootstrapcdn.com/bootstrap/3.4.1/js/bootstrap.min.js"></script>
	<link rel="stylesheet" href="https://maxcdn.bootstrapcdn.com/bootstrap/3.4.1/css/bootstrap.min.css">
	<style type="text/css">
		.loader-div {
			display: none;
			position: fixed;
			margin: 0px;
			padding: 0px;
			right: 0px;
			top: 0px;
			width: 100%;
			height: 100%;
			background-color: #fff;
			z-index: 30001;
			opacity: 0.8;
		}
		.loader-img {
			position: absolute;
			top: 0;
			bottom: 0;
			left: 0;
			right: 0;
			margin: auto;
		}
	</style>

</head>
<body>

<div class="container">
  <div class="row">
	<div class="col-sm-12">
		<br>
		<button type="button" class="btn btn-success" onclick="display_data()">Get data with Ajax</button>
		<br>
		<table class="table table-striped">
		<thead>
		  <tr>
			<th>Event #</th>
			<th>Event name</th>
			<th>Start date</th>
			<th>End date</th>
		  </tr>
		</thead>
		<tbody id="dynamic_data">
		</tbody>
		</table>
	</div><!-- end col -->
	</form>
  </div><!--  end row -->
</div>
<br>
<center>Developed by <a href="https://shinerweb.com/">Shinerweb</a></center>
<div class="loader-div">
    <img class="loader-img" src="ajax-loader.gif" style="height: 120px;width: auto;" />
</div>
</body>
	<script type="text/javascript">
		function display_data() {
			$(".loader-div").show(); // show loader
			$.ajax({
				 url:"display_data.php",
				 type:"POST",
				 dataType: 'json',
				 success:function(response){
					 $('#dynamic_data').html('');
					 if(response.status == true)
					 {
					   $('#dynamic_data').html(response.data);
					   $(".loader-div").hide(); // hide loader
					 }
					 else
					 {
						$(".loader-div").hide(); // hide loader
						alert(response.msg);
					 }
				  },
				  error: function (xhr, status) {
					$(".loader-div").hide(); // hide loader
					console.log('ajax error = ' + xhr.statusText);
					alert(response.msg);
				  }
			 });
		}
    </script>
</html>
In above code we have included some CSS and JavaScript library like jquery.min.js, bootstrap.min.js and bootstrap.min.css which is used for web designing and make it much easier to use JavaScript on your website.
We added some custom CSS class like .loader-div and .loader-img that will be helpful to display your loader image in center.
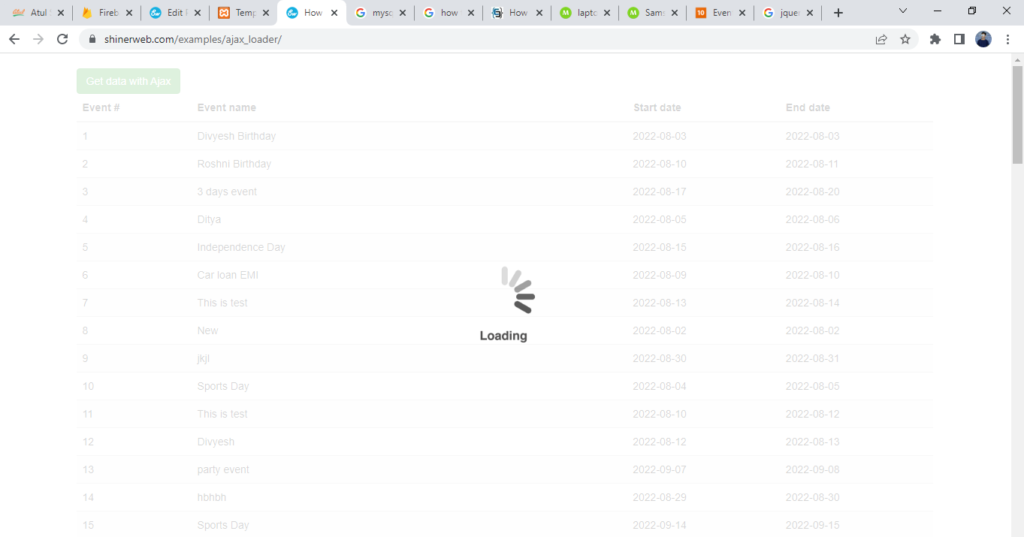
We create one button and set onclick method. In above code you can see we have declare onclick="display_data()" event. When you click on this button we call AJAX to get data from the database.
Inside display_data() function we have added below code to show loader while Ajax call in progress.
$(".loader-div").show(); // show loaderTo hide loader you need to use below code.
$(".loader-div").hide(); // hide loaderStep 3: Finally you need to create one PHP file like display_data.php to get data from the database.
<?php
require 'database_connection.php';
$display_query = "select event_id,event_name,event_start_date,event_end_date from calendar_event_master";
$results = mysqli_query($con,$display_query);
$count = mysqli_num_rows($results);

if($count>0)
{
	$dynamic_data='';
	while($data_row = mysqli_fetch_array($results, MYSQLI_ASSOC))
	{
		$dynamic_data .= "<tr><td>".$data_row['event_id']."</td><td>".$data_row['event_name']."</td><td>".$data_row['event_start_date']."</td><td>".$data_row['event_end_date']."</td></tr>";
	}
	$data = array(
                'status' => true,
                'msg' => 'Successfully!',
				'data' => $dynamic_data
            );
}
else
{
	$data = array(
                'status' => false,
                'msg' => 'Error!'
            );
}
echo json_encode($data);
?>
In above code we have included one connection file database_connection.php that will be helpful to connect your database.
<?php
$hostname = "localhost";
$username = "your_user";
$password = "your_password";
$database = "your_database";
$con=mysqli_connect($hostname,$username,$password,$database);
?>
Once your database connected then you need to write one select query to retrieve data from the database. Finally you need to sent response with json_encode($data) and that data will be display on page.

