In this blog we will create live demo to send message by using JavaScript Firebase Cloud Messaging client app. Firebase Cloud Messaging (FCM) is a cross-platform messaging solution that lets you reliably send messages at no cost.

Let’s start step by step configuration for Firebase Cloud Messaging.
Step 1: Go to https://console.firebase.google.com/ and click on Add Project.

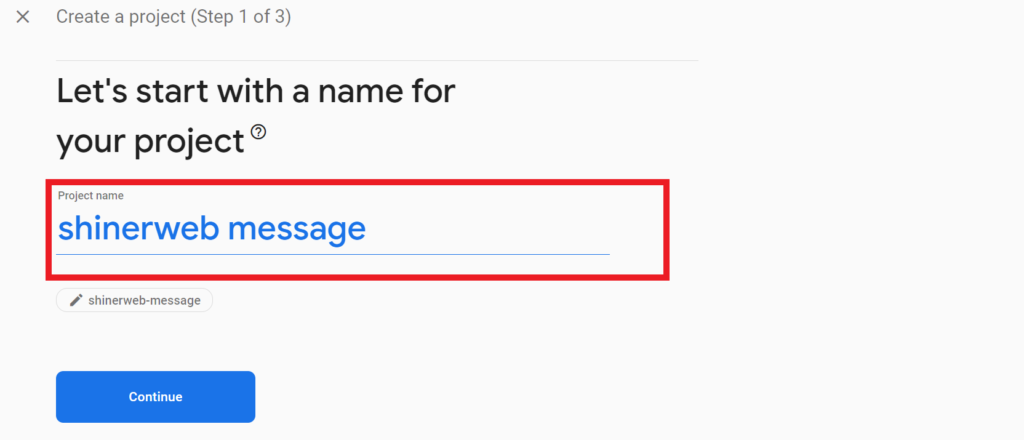
Step 2: Enter your project name and click on continue.
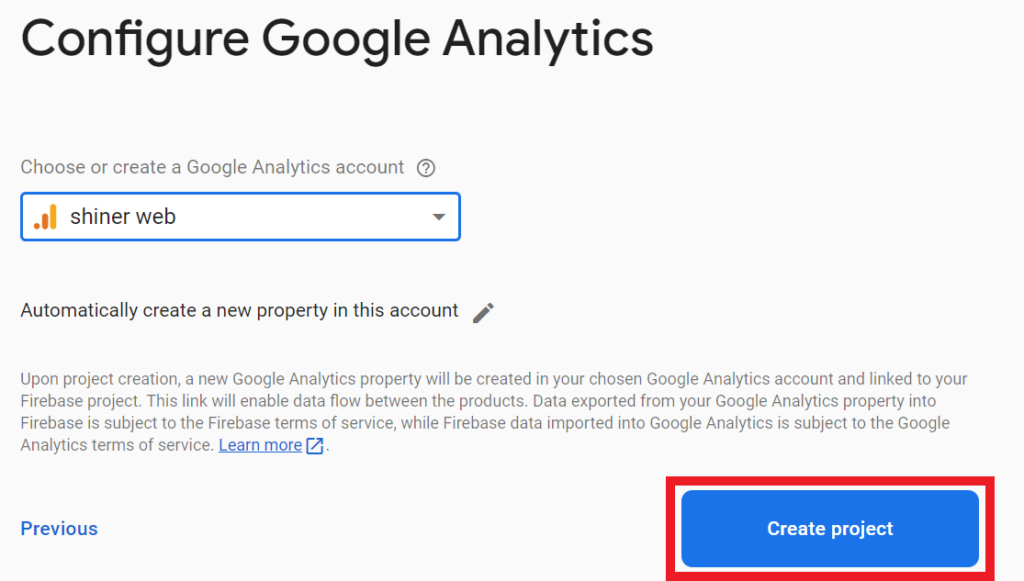
Step 3: Select Google analytics account and click on Create project.
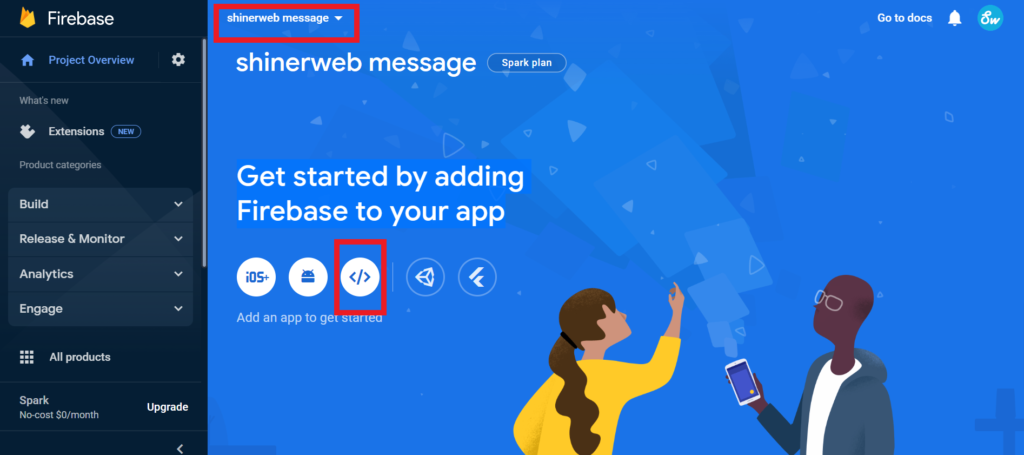
Step 4: Now adding Firebase to your app. Select your project and click on Code icon and Register app.
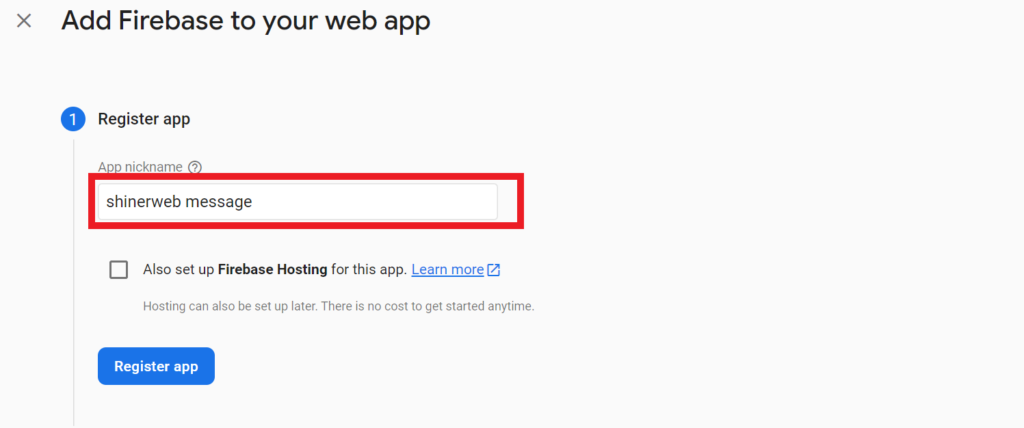
Step 5: Enter your App name and click on Register App.
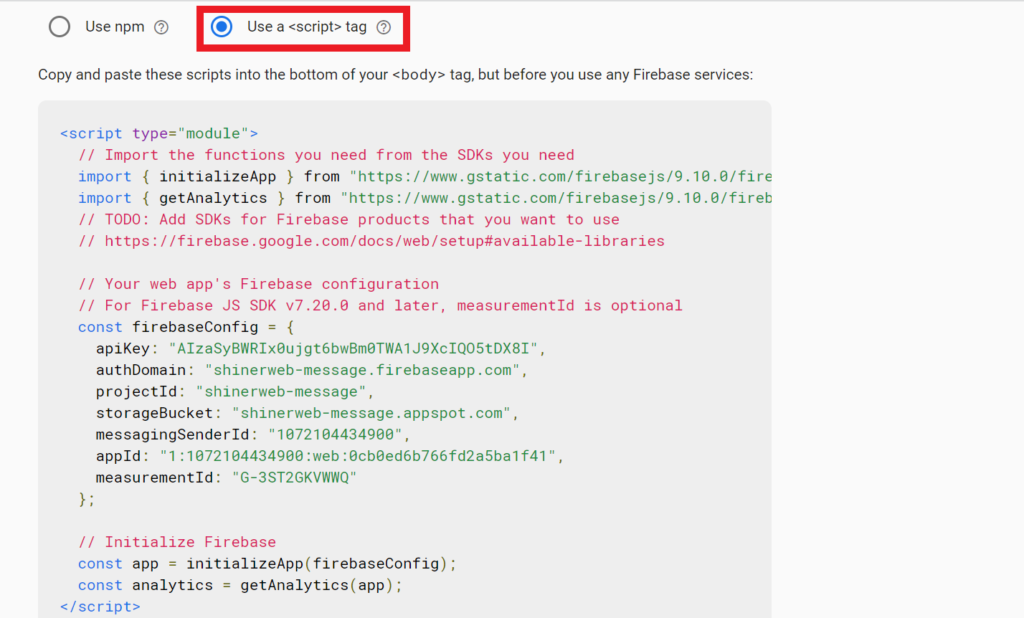
Step 6: Copy and paste these scripts into the bottom of your <body> tag, but before you use any Firebase services.
Step 7: Now you need to Add the Firebase Cloud Messaging JS SDK and initialize Firebase Cloud Messaging:
<script type="module">
	  // Import the functions you need from the SDKs you need
	  import { initializeApp } from "https://www.gstatic.com/firebasejs/9.10.0/firebase-app.js";
	  import { getAnalytics } from "https://www.gstatic.com/firebasejs/9.10.0/firebase-analytics.js";
	  //For message
	  import { getMessaging } from "https://www.gstatic.com/firebasejs/9.10.0/firebase-messaging.js";

	  // TODO: Add SDKs for Firebase products that you want to use
	  // https://firebase.google.com/docs/web/setup#available-libraries

	  // Your web app's Firebase configuration
	  // For Firebase JS SDK v7.20.0 and later, measurementId is optional
	  const firebaseConfig = {
	    apiKey: "AIzaSyBWRIx0ujgt6bwBm0TWA1J9XcIQO5tDX8I",
	    authDomain: "shinerweb-message.firebaseapp.com",
	    projectId: "shinerweb-message",
	    storageBucket: "shinerweb-message.appspot.com",
	    messagingSenderId: "1072104434900",
	    appId: "1:1072104434900:web:0cb0ed6b766fd2a5ba1f41",
	    measurementId: "G-3ST2GKVWWQ"
	  };

	  // Initialize Firebase
	  const app = initializeApp(firebaseConfig);
	  const analytics = getAnalytics(app);

	  // Initialize Firebase Cloud Messaging and get a reference to the service
	  const messaging = getMessaging(app);
	  console.log(messaging);
	</script>
In above code we have included firebase-messaging.js which is used for send/receive messages.
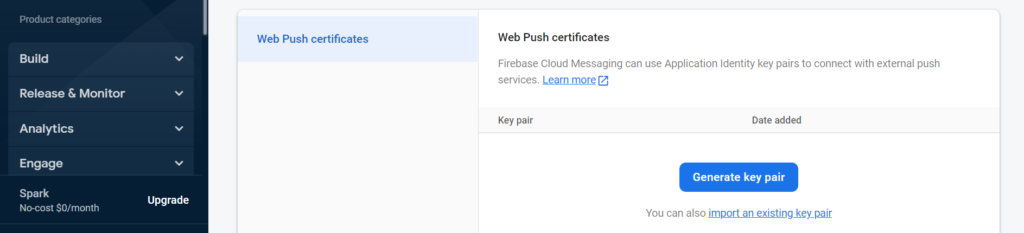
Step 8: Now you need to Configure Web Credentials with FCM.
The FCM Web interface uses Web credentials called “Voluntary Application Server Identification,” or “VAPID” keys, to authorize send requests to supported web push services.
- Open the Cloud Messaging tab of the Firebase console Settings pane and scroll to the Web configuration section.
- In the Web Push certificates tab, click Generate Key Pair. The console displays a notice that the key pair was generated, and displays the public key string and date added.

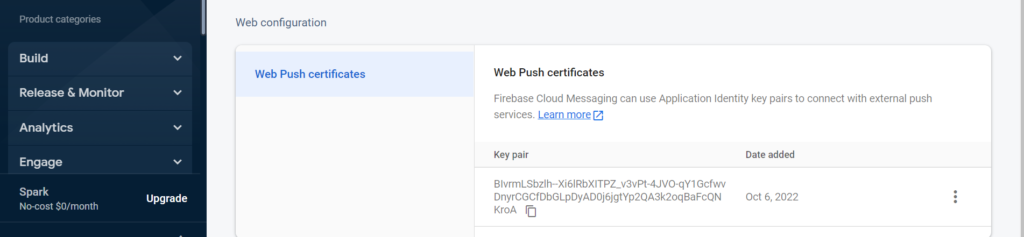
Note*: Please save your Key Pair that will be used in below code.
Step 9: Create one file index.html and add your configuration in this file.
<!DOCTYPE html>
<html>
<head>
	<meta name="viewport" content="width=device-width, initial-scale=1.0">
	<script src="https://cdnjs.cloudflare.com/ajax/libs/jquery/3.6.0/jquery.min.js" ></script>
	<!-- Bootstrap theme -->
	<link rel="stylesheet" href="https://maxcdn.bootstrapcdn.com/bootstrap/3.4.1/css/bootstrap.min.css">
	<script src="https://maxcdn.bootstrapcdn.com/bootstrap/3.4.1/js/bootstrap.min.js"></script>
	<title>How to Send Text Messages by using Firebase</title>
</head>
<body>

<div class="container">
  <form name="registration_form" id="registration_form" method="post" action="#" enctype="multipart/form-data" >
  <div class="row">

	<div class="col-sm-12">
		<div class="form-group">
	      <label for="currentToken">Your token</label>
		  <input type="text" name="currentToken" id="currentToken" class="form-control" placeholder="Your token">
		</div>
	</div><!-- end col -->
	</form>
  </div><!--  end row -->
  </form>
</div>
<br>
<center>Developed by <a href="https://shinerweb.com/">Shinerweb</a></center>
</body>
	<script type="module">
  // Import the functions you need from the SDKs you need
  import { initializeApp } from "https://www.gstatic.com/firebasejs/9.10.0/firebase-app.js";
  import { getAnalytics } from "https://www.gstatic.com/firebasejs/9.10.0/firebase-analytics.js";
  //For message
  import { getMessaging, getToken } from "https://www.gstatic.com/firebasejs/9.10.0/firebase-messaging.js";

  // TODO: Add SDKs for Firebase products that you want to use
  // https://firebase.google.com/docs/web/setup#available-libraries

  // Your web app's Firebase configuration
  // For Firebase JS SDK v7.20.0 and later, measurementId is optional
  const firebaseConfig = {
    apiKey: "AIzaSyBWRIx0ujgt6bwBm0TWA1J9XcIQO5tDX8I",
    authDomain: "shinerweb-message.firebaseapp.com",
    projectId: "shinerweb-message",
    storageBucket: "shinerweb-message.appspot.com",
    messagingSenderId: "1072104434900",
    appId: "1:1072104434900:web:0cb0ed6b766fd2a5ba1f41",
    measurementId: "G-3ST2GKVWWQ"
  };

  // Initialize Firebase
  const app = initializeApp(firebaseConfig);
  const analytics = getAnalytics(app);

  // Initialize Firebase Cloud Messaging and get a reference to the service
  const messaging = getMessaging(app);
  console.log(messaging);
  //BIvrmLSbzlh--Xi6lRbXITPZ_v3vPt-4JVO-qY1GcfwvDnyrCGCfDbGLpDyAD0j6jgtYp2QA3k2oqBaFcQNKroA

  // Add the public key generated from the console here.
  getToken(messaging, { vapidKey: 'BIvrmLSbzlh--Xi6lRbXITPZ_v3vPt-4JVO-qY1GcfwvDnyrCGCfDbGLpDyAD0j6jgtYp2QA3k2oqBaFcQNKroA' }).then((currentToken) => {
	  if (currentToken) {
	    // Send the token to your server and update the UI if necessary
	    console.log(currentToken);
	    document.getElementById("currentToken").value = currentToken;
	    // ...
	  } else {
	    // Show permission request UI
	    console.log('No registration token available. Request permission to generate one.');
	    // ...
	  }
	}).catch((err) => {
	  console.log('An error occurred while retrieving token. ', err);
	  // ...
	});

</script>
</html>
Once you allow then your token will be generated and that token will use to send message.

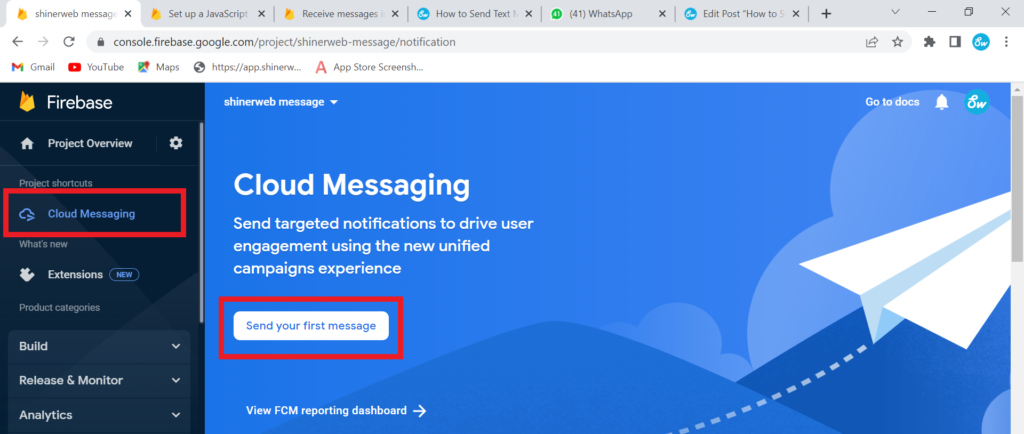
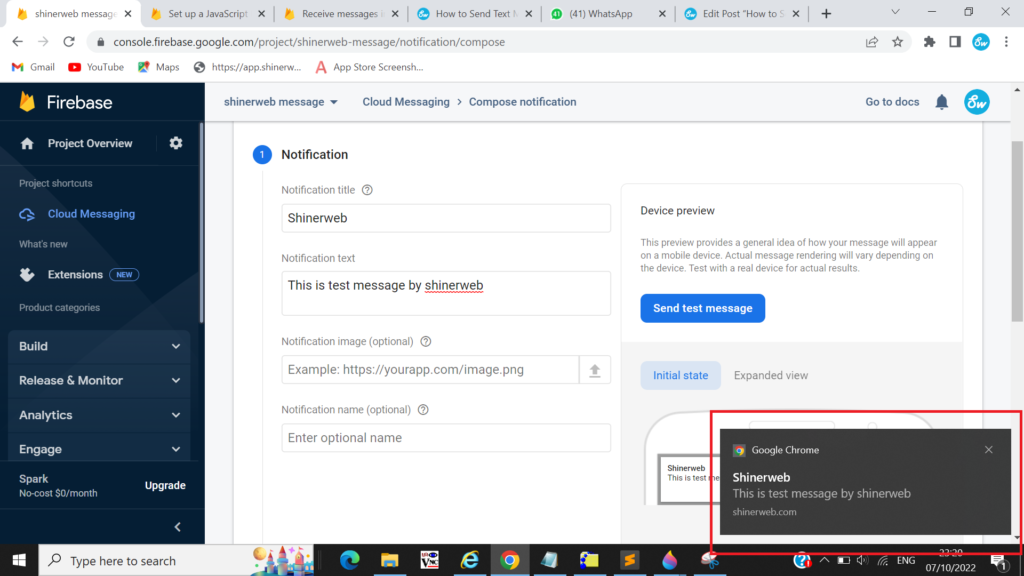
Step 10: Now you need to copy above token and go to dashboard and send your first message.
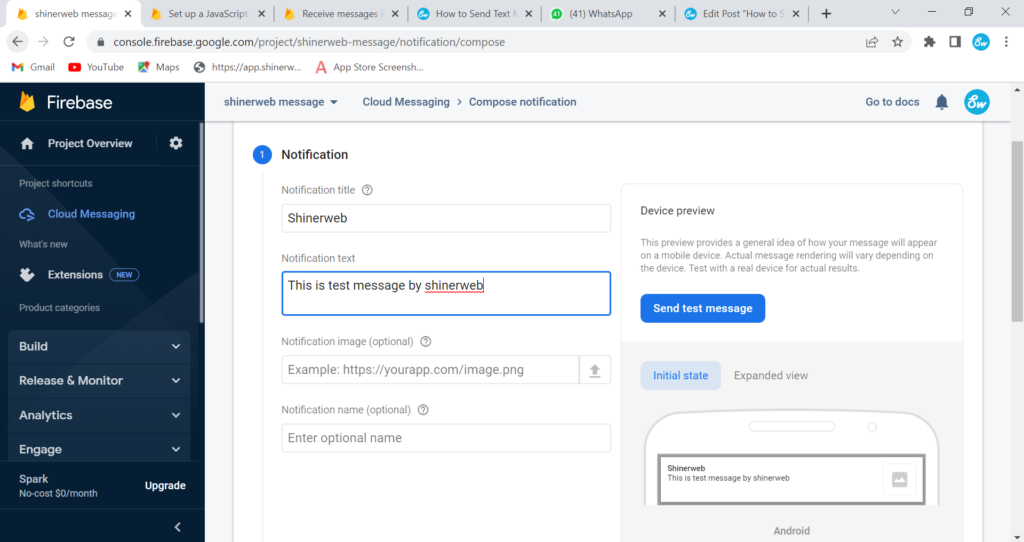
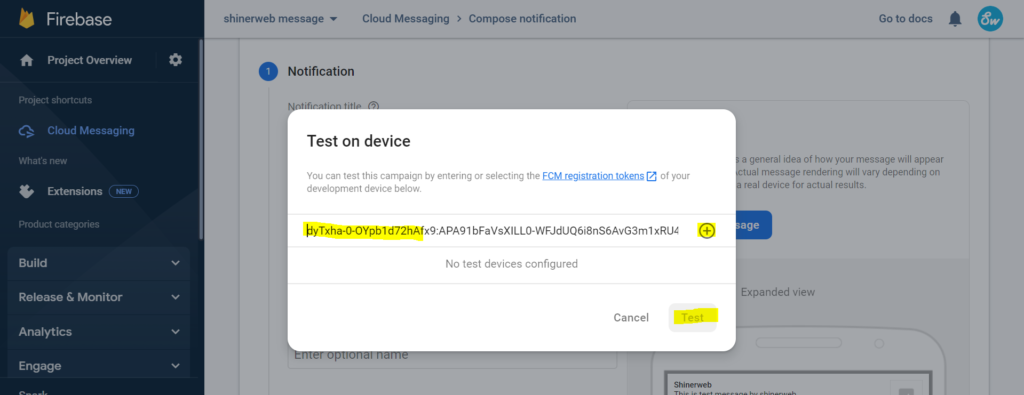
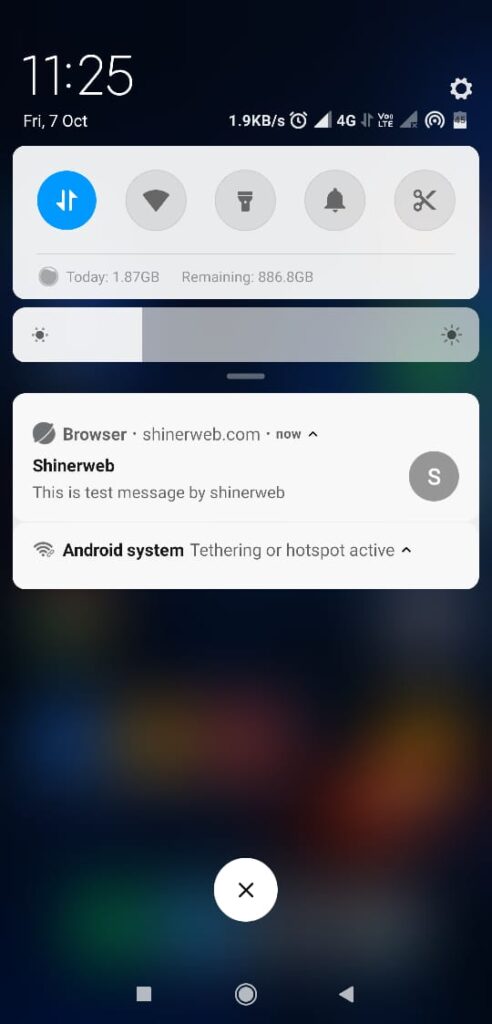
Once you add message title, text and token then click on test and output message as below.
Here we have tested this message notification in mobile also see the screenshot.