In this blog we will learn how to send an email by using PHP. We are using PHPMailer library for sending an email. PHPMailer is a code library to send emails safely and easily via PHP code from a web server. Sending emails directly by PHP code requires a high-level familiarity to SMTP protocol standards and related issues and vulnerabilities about Email injection for spamming.
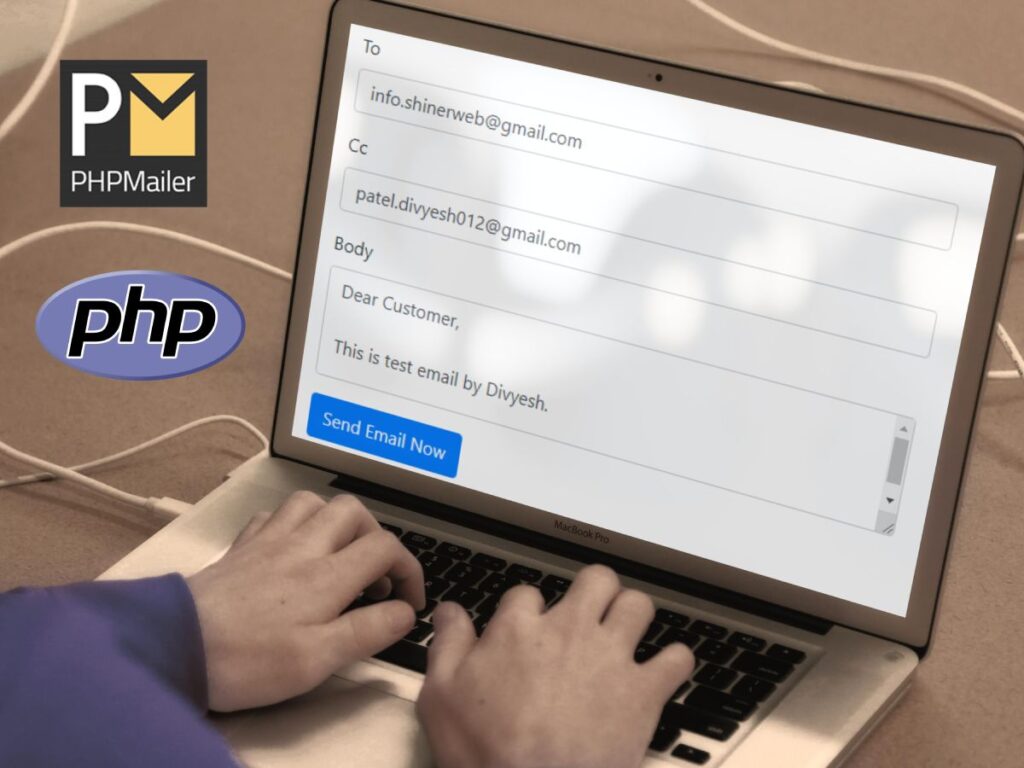
The most important part of this blog is how to configure php code or which library are required. So don’t waste much time and let’s start coding and configuration step by steps.
Step 1: Create one file like index.php where we will design one simple form to send an email.
<!doctype html>
<html lang="en">
  <head>
    <title>How to send an email by using PHP</title>
    <meta charset="utf-8" />
    <meta name="viewport" content="width=device-width, initial-scale=1.0">
    <meta http-equiv="X-UA-Compatible" content="IE=edge,chrome=1" />
    <meta name="viewport" content="width=device-width" />
    <!-- *Note: You must have internet connection on your laptop or pc other wise below code is not working -->
    <!-- JS for jQuery -->
    <script src="https://cdnjs.cloudflare.com/ajax/libs/jquery/3.3.1/jquery.min.js"></script>
    <!-- bootstrap css and js -->
    <link rel="stylesheet" href="https://maxcdn.bootstrapcdn.com/bootstrap/4.0.0/css/bootstrap.min.css" />
    <script src="https://maxcdn.bootstrapcdn.com/bootstrap/4.0.0/js/bootstrap.min.js"></script>undefined
  </head>undefined<body>
    <div class="container">
      <br>
      <h5>How to send mail using PHPMailer in PHP</h5>
      <br>
      <form method="post" action="sendmail.php">
        <div class="row">
          <div class="col-sm-6">
            <div class="form-group">
              <label for="to_mailid">To</label>
              <input type="text" name="to_mailid" id="to_mailid" class="form-control" placeholder="To email address">
            </div>
          </div>
        </div>
        <div class="row">
          <div class="col-sm-6">
            <div class="form-group">
              <label for="cc_mailid">Cc</label>
              <input type="text" name="cc_mailid" id="cc_mailid" class="form-control" placeholder="Cc email address">
            </div>
          </div>
        </div>
        <div class="row">
          <div class="col-sm-6">
            <div class="form-group">
              <label for="event_name">Body</label>
              <textarea name="mail_body" id="mail_body" class="form-control"></textarea>
            </div>
          </div>
        </div>
        <button type="submit" class="btn btn-primary">Send Email Now</button>
      </form>
    </div>
    <br>
    <br>
    <center>Developed by <a href="https://shinerweb.com/">Shinerweb</a>
    </center>
  </body>
</html>
Step 2: Create one more file like sendmail.php where we will write email sending code as below.
<?php
error_reporting(E_ALL ^ E_DEPRECATED);
include_once('class.phpmailer.php');
require ('PHPMailerAutoload.php');

$to_mailid=$_POST['to_mailid'];
$cc_mailid=$_POST['cc_mailid'];
$mail_body=$_POST['mail_body'];

$body='';
$body .="<html>
<head>
<style type='text/css'>
body {
font-family: Calibri;
font-size:16px;
color:#000;
}
table, th, td {
border-collapse: collapse;
}
.mail-font{font-size:16px;}
.label-bg {background-color:rgb(105,158,150);color:#fff;text-align:center;}
td{font-family: calibri;}
</style>
</head>
<body>
'".$mail_body."'
</body>
</html>";

$mail = new PHPMailer();
$mail->CharSet = 'UTF-8';
$mail->IsMAIL();
$mail->IsSMTP();
$mail->Subject    = "Daily coding solutions by shinerweb";
$mail->From = "[email protected]";
$mail->FromName = "Shinerweb Technologies";
$mail->IsHTML(true);
$mail->AddAddress($to_mailid); // To mail id
$mail->AddCC($cc_mailid); // Cc mail id
//$mail->AddBCC('[email protected]');

//$file_location="./upload/";
//$file_name="1529055795.png";
//$mail->AddAttachment($file_location.$file_name);
$mail->MsgHTML ($body);
$mail->WordWrap = 50;
$mail->Send();
$mail->SmtpClose();
if($mail->IsError()) {
echo "Mailer Error: " . $mail->ErrorInfo;
} else {
	echo "Message sent!";
};
?>
In above code you can see we have included some PHP library like class.phpmailer.php and PHPMailerAutoload.php which is required for sending an email. I will share all those library in my source code so you can download it.
Step 3: Need to configure hostname, port number and username in class.phpmailer.php file.
Note*: You must have to configure below details in your class.phpmailer.php file otherwise your mail will not send.
public $Host = 'mail.your_hostname.com'; //line no 226
public $Port = 587; //line no 233
public $Username = 'mail@your_email.com'; //line no 277
public $Password = 'your_password'; //line no 283
If you don’t know how to get all above configuration then please watch below video.
View received mail details as below.


