In this blog we will learn how to enable and customize reCAPTCHA v3 on your webpage. reCAPTCHA uses an advanced risk analysis engine and adaptive challenges to keep malicious software from engaging in abusive activities on your website.

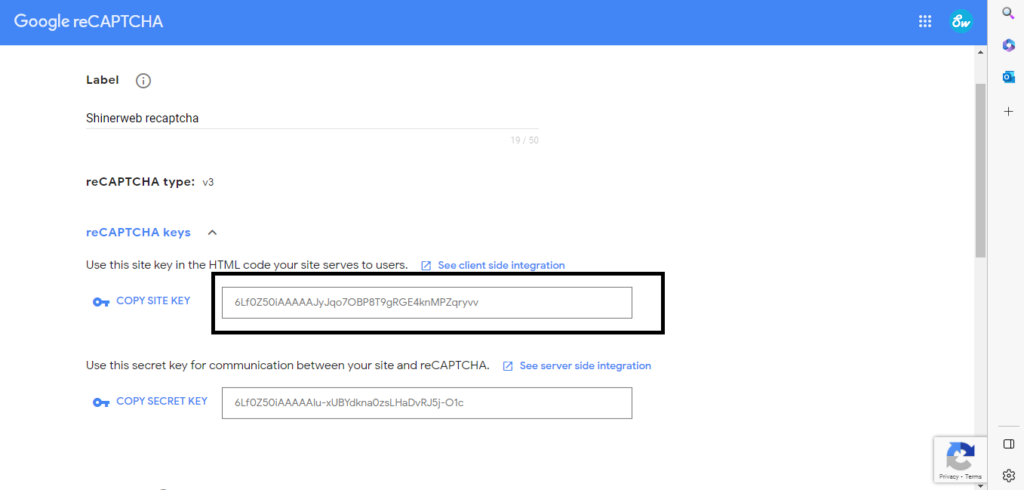
Step 1: Register reCAPTCHA v3 keys on the reCAPTCHA Admin console.

Label: Use a label that will make it easy for you to identify the site in the future.
reCAPTCHA type: Choose the type of reCAPTCHA for this site key. A site key only works with a single reCAPTCHA site type.
Domains: Your registration is restricted to the domains you enter here, plus any subdomains. In other words, a registration for example.com also registers subdomain.example.com. A valid domain requires a host and must not include any path, port, query or fragment.
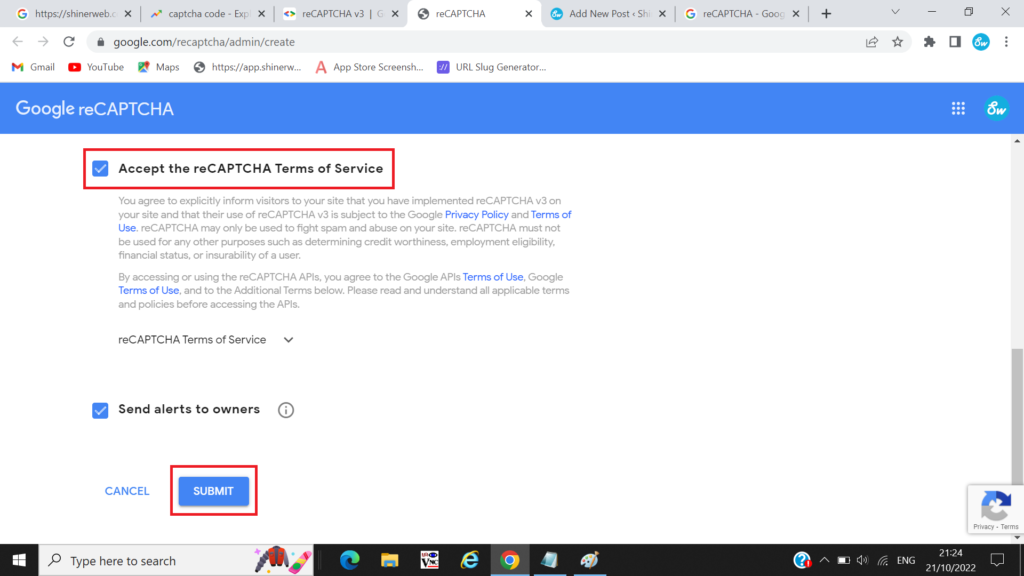
Now you can click on Submit to generate key.
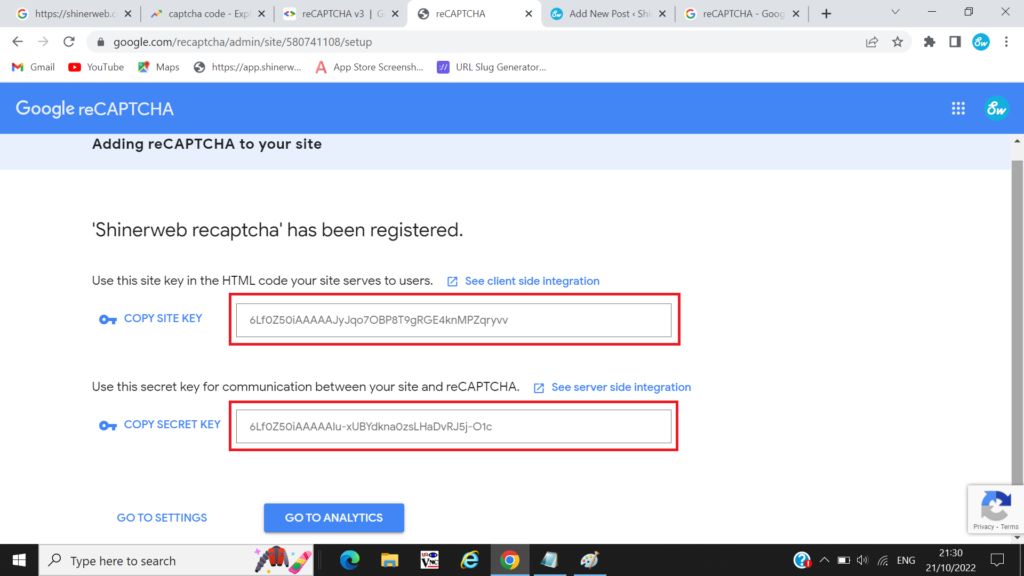
You must have to save above secret key which is use for client and server side intergration.
Step 2: Create one simple login page with below code.
<!-- Required library -->
<script src="https://cdnjs.cloudflare.com/ajax/libs/jquery/3.6.0/jquery.min.js"></script>
<!-- Bootstrap theme -->
<link rel="stylesheet" href="https://maxcdn.bootstrapcdn.com/bootstrap/3.4.1/css/bootstrap.min.css">
<script src="https://maxcdn.bootstrapcdn.com/bootstrap/3.4.1/js/bootstrap.min.js"></script>
<!-- reCAPTCHA v3 js -->
<script src="https://www.google.com/recaptcha/api.js?render=6Lf0Z50iAAAAAJyJqo7OBP8T9gRGE4knMPZqryvv"></script>
Create on file like google-recaptcha.php and include jQuery and Bootstrap related libraries which is helpful for login page creation and most important to add reCAPTCHA v3 library in to your code.
Note*: Put your site key while include api.js file in your code (render=6Lf0Z50iAAAAAJyJqo7OBP8T9gRGE4knMPZqryvv)
Step 3: Write some HTML code for login page design.
<form name="login_form" id="login_form" method="post" action="#" enctype="multipart/form-data">
  <div class="row">
    <div class="col-sm-4">
      <div class="form-group">
        <label for="email">Email</label>
        <input type="text" name="email" id="email" class="form-control" placeholder="Enter your email" required="true">
      </div>
      <div class="form-group">
        <label for="password">Password</label>
        <input type="password" name="password" id="password" class="form-control" placeholder="Enter your password" required="true">
      </div>
      <button type="button" onclick="login()" class="btn btn-success">Login Now</button>
    </div>
    <!-- end col -->
</form>
Step 4: Create one function to check login details.
<script>
  function login() {
    grecaptcha.ready(function() {
      grecaptcha.execute('6Lf0Z50iAAAAAJyJqo7OBP8T9gRGE4knMPZqryvv', {
        action: 'submit'
      }).then(function(token) {
        // Add your logic to submit to your backend server here.
        var email = $("#email").val();
        var password = $("#password").val();
        console.log(email);
        console.log(password);
        console.log(token);
        $.ajax({
          url: "login_check.php",
          type: "POST",
          dataType: 'json',
          data: {
            email: email,
            password: password,
            token: token
          },
          success: function(response) {
            if (response.status == true) {
              alert(response.msg);
            } else {
              alert(response.msg);
            }
          },
          error: function(xhr, status) {
            console.log('ajax error = ' + xhr.statusText);
          }
        });
      });
    });
  }
</script>
In above code we will generate one token by using grecaptcha.execute() and pass this token with email and password to backend side by using AJAX call. Once we will submit those details via AJAX call and verify site response.
Step 5: Create one simple table with below sample data.
CREATE TABLE `users_master` (
  `id` int(11) NOT NULL AUTO_INCREMENT,
  `email` varchar(255) DEFAULT NULL,
  `password` varchar(255) DEFAULT NULL,
  PRIMARY KEY (`id`)
) ENGINE=InnoDB DEFAULT CHARSET=latin1;

INSERT INTO `users_master` (`id`, `email`, `password`) VALUES (1, '[email protected]', '123456');

INSERT INTO `users_master` (`id`, `email`, `password`) VALUES (2, '[email protected]', '123456');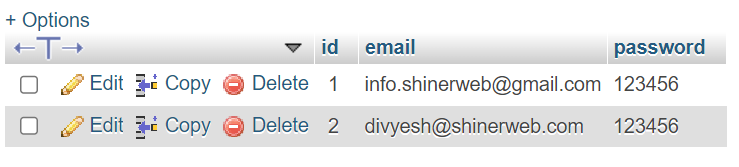
Step 6: Make one database connection file.
<?php
$db_hostname = "localhost";
$db_username = "root";
$db_password = "your_password";
$db_database = "your_database_name";
$con=mysqli_connect($db_hostname,$db_username,$db_password,$db_database);
?>
You can set this file name as database_connection.php and use that connection file in further code.
Step 7: Finally verify the response token and check user credentials in database.
<?php
$email = $_POST['email'];
$password = $_POST['password'];
$token = $_POST['token'];

// call curl to POST request
$ch = curl_init();
curl_setopt($ch, CURLOPT_URL,"https://www.google.com/recaptcha/api/siteverify");
curl_setopt($ch, CURLOPT_POST, 1);
curl_setopt($ch, CURLOPT_POSTFIELDS, http_build_query(array('secret' => '6Lf0Z50iAAAAAIu-xUBYdkna0zsLHaDvRJ5j-O1c', 'response' => $token)));
curl_setopt($ch, CURLOPT_RETURNTRANSFER, true);
$response = curl_exec($ch);
curl_close($ch);
$arrResponse = json_decode($response, true);
//print_r($arrResponse);
// verify the response
if($arrResponse["success"] == '1' && $arrResponse["score"] >= 0.5) {
    // valid submission
    // demo purpose

	include "database_connection.php";
	$query = "select * from users_master where email='".$email."' and password='".$password."' ";
	$result = mysqli_query($con,$query);
	$rowcount=mysqli_num_rows($result);
	if($rowcount>=1)
	{
		$data = array(
				'status' => true,
				'score' => $arrResponse["score"],
				'msg' => 'Login successfully.',
			);
	} else {
		$data = array(
				'status' => true,
				'score' => $arrResponse["score"],
				'msg' => 'Invalid login credentials.',
			);
	}
} else {
    // spam submission
    // show error message
	$data = array(
				'status' => true,
				'score' => $arrResponse["score"],
				'msg' => 'Spam submission.',
			);
}
echo json_encode($data);
?>
In above code we will store all the details in to the variable like $email, $password and $token and.
The most important to verify site response you must have to write your secret key
curl_setopt($ch, CURLOPT_POSTFIELDS, http_build_query(array('secret' => '6Lf0Z50iAAAAAIu-xUBYdkna0zsLHaDvRJ5j-O1c', 'response' => $token)));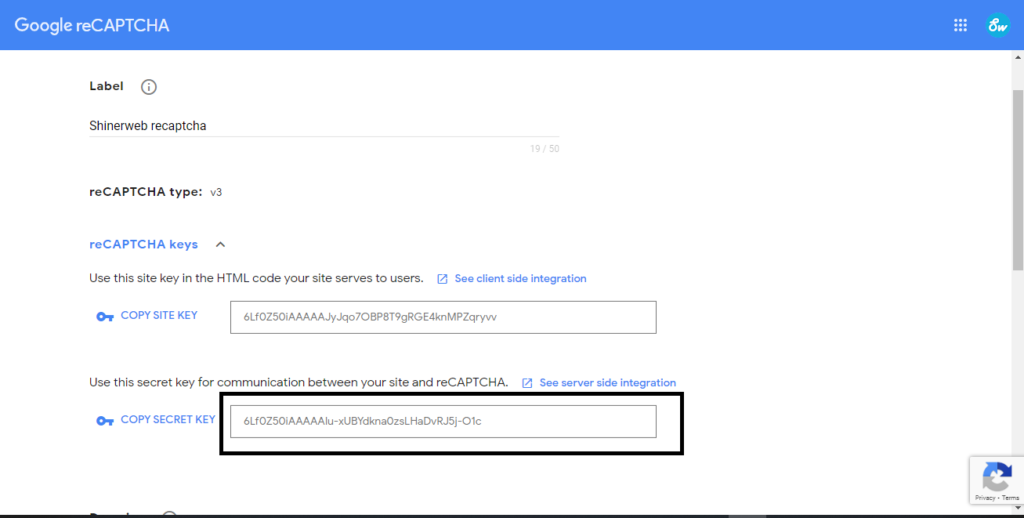
Finally you can check your API response with below IF condition.
if($arrResponse["success"] == '1' && $arrResponse["score"] >= 0.5) {
// valid submission
}
else
{
// spam submission
}
Note*: Here we check success code = 1 and we required score more then 0.5 then and then we will allow user to login in our system.
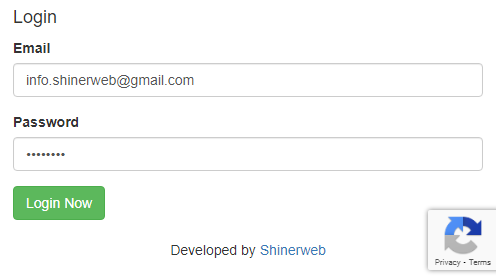
Final output as below:
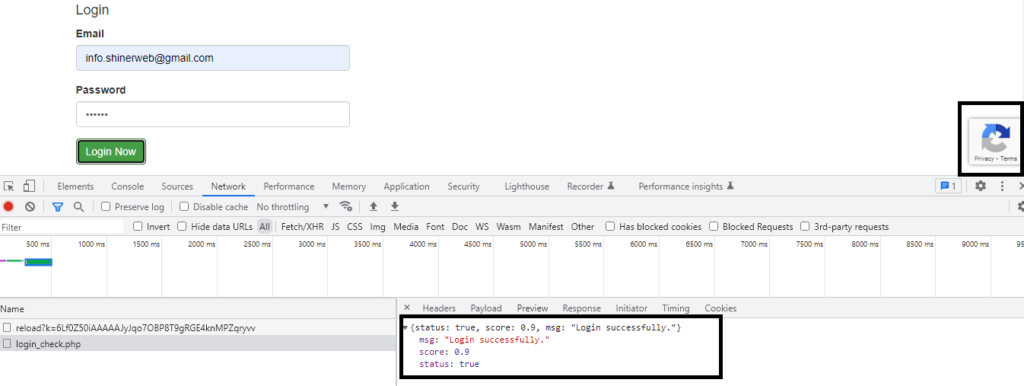
You can try all above steps and also we have share all the code with you so you can also prefer that code. If you have any query then write your comments in comments section.