In this blog we will integrate DataTables in our PHP and MySQL web application. This is a Javascript HTML table enhancing library which we can use to enabling fast and efficient data searching.

Step 1: Setting up the Basic HTML Structure
Start by creating PHP file to define the structure of your webpage. This includes the required links to external CSS libraries, and the script tags for jQuery and DataTables.js.
<!doctype html>
<html lang="en">
<head>
    <title>Data tables</title>
    <meta charset="utf-8" />
    <meta name="viewport" content="width=device-width, initial-scale=1.0">
    <meta http-equiv="X-UA-Compatible" content="IE=edge,chrome=1" />
    <!-- Add icon library -->
    <link rel="stylesheet" href="https://cdnjs.cloudflare.com/ajax/libs/font-awesome/4.7.0/css/font-awesome.min.css">
    <!-- Bootstrap CSS and JS -->
    <link rel="stylesheet" href="https://maxcdn.bootstrapcdn.com/bootstrap/4.0.0/css/bootstrap.min.css"/>
    <link rel="stylesheet" href="https://cdn.datatables.net/2.2.2/css/dataTables.dataTables.css"/>
    <!-- jQuery and DataTables.js -->
    <script src="https://code.jquery.com/jquery-3.7.1.js"></script>
    <script src="https://maxcdn.bootstrapcdn.com/bootstrap/4.0.0/js/bootstrap.min.js"></script>
    <script src="https://cdn.datatables.net/2.2.2/js/dataTables.js"></script>
</head>
Step 2: Defining the Table Structure inside <body> tag
<body>
<div class="container">
    <div class="row">
        <div class="col-lg-12" align="center">
            <h5>Invoice details</h5>
            <table class="table table-striped" id="myTable">
                <thead>
                  <tr>
                    <th>Invoice #</th>
                    <th>Customer name</th>
                    <th>Contact #</th>
                    <th>Address</th>
                    <th>Action</th>
                  </tr>
                </thead>
                <tbody>
                    <!-- PHP-generated rows will go here -->
                </tbody>
            </table>
        </div>
    </div>
</div>
</body>
The id="myTable" is important for targeting the table with DataTables.js later.
Step 3: Make MySQL database connection file like database_connection.php which is used to get data from the database.
<?php
$hostname = "localhost";
$username = "root";
$password = "";
$database = "shinerweb_db";
$con=mysqli_connect($hostname,$username,$password,$database);
?>
Step 4: Write below PHP Code to Fetch Data from Database
Now, we need to fetch data from the MySQL database and display it in the table rows. Make sure to include your database connection at the beginning of the file.
<?php
require 'database_connection.php';
$display_query = "SELECT T1.MST_ID, T1.INV_NO, T1.CUSTOMER_NAME, T1.CUSTOMER_MOBILENO, T1.ADDRESS FROM INVOICE_MST T1";
$results = mysqli_query($con,$display_query);
$count = mysqli_num_rows($results);
if($count > 0) {
while($data_row = mysqli_fetch_array($results, MYSQLI_ASSOC)) {
?>
<tr>
<td><?php echo $data_row['INV_NO']; ?></td>
<td><?php echo $data_row['CUSTOMER_NAME']; ?></td>
<td><?php echo $data_row['CUSTOMER_MOBILENO']; ?></td>
<td><?php echo $data_row['ADDRESS']; ?></td>
<td>
<a href="#" class="btn btn-success"><i class="fa fa-search"></i> View </a>
<a href="#" class="btn btn-danger"><i class="fa fa-trash"></i> Delete</a>
<a href="#" class="btn btn-warning"><i class="fa fa-edit"></i> Edit</a>
</td>
</tr>
<?php
}
}
?>In this step, we use a MySQL query to fetch the invoice details from the database and dynamically populate the rows in the HTML table.
Step 4: Enable DataTables Functionality with below JavaScript code
To enable the DataTables functionality, which provides features like sorting, searching, and pagination, we need to add a script at the end of the HTML body.
<script type="text/javascript">
$('#myTable').DataTable();
</script>
This will automatically convert your static HTML table into an interactive table with all the features provided by DataTables.js.
Step 5: Now you can test your page
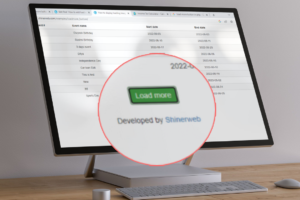
Make sure your PHP file is running on a local server like XAMPP or a live server with MySQL access. If everything is set up correctly, you should see a table displaying your invoice details with DataTables functionality enabled.
Conclusion
This blog demonstrates how to create an interactive data table with PHP, MySQL, and DataTables.js. By following these simple steps, you can display data from your database dynamically while providing a better user experience with advanced table features like sorting, searching, and pagination.